

For those looking to connect their IceRiver ASIC miners to HiveOS, it’s an efficient way to consolidate your mining management and keep everything under one roof. Hiveon OS Client, with its capability to support a diverse range of ASIC models, makes it a must-have for serious miners. This guide will walk you through the process step by step, making it easier than ever to set up.
Prerequisites:
- An IceRiver ASIC miner.
- Active internet connection.
- A computer to manage the setup.
Steps:
- HiveOS Account Creation:
- Begin by creating a HiveOS account if you haven’t already. Go to Hiveon OS and follow the sign-up process. This account will be your central hub for managing all your mining activities.
- Download HiveOS ASIC Hub:
- Once registered, you’ll need the HiveOS ASIC hub software. It’s the key bridge between your ASIC miner and your HiveOS account. Navigate to the download section on Hiveon and download the latest version of ASIC Hub suitable for your operating system.
- Linking ASIC Miner with HiveOS:
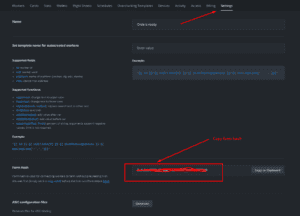
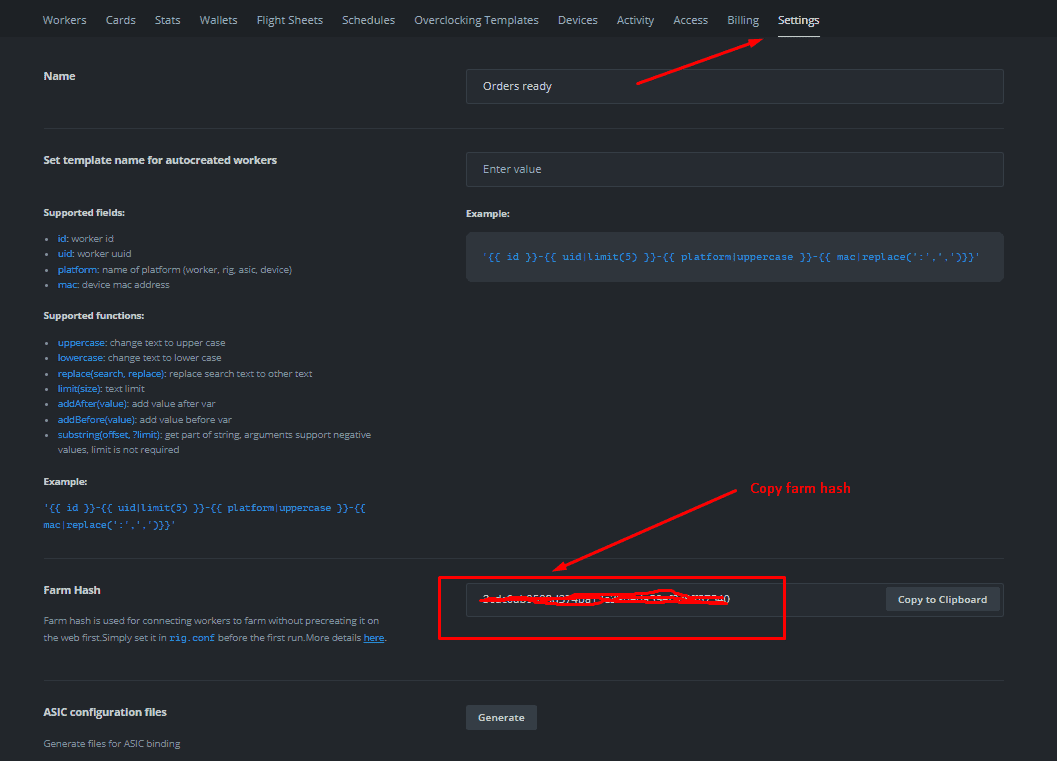
- After successfully installing the ASIC Hub, open it. Here, you will be prompted to insert your ‘Farm Hash’ from your HiveOS account.
- You need to update the ASIC Hub to latest BETA version , otherwise curently 04.09.23 your Iceriver ASIC miner will not show up.
- Navigate back to your HiveOS dashboard. Under ‘Settings’ or ‘Farm Settings’, locate your Farm Hash. Copy this hash.
- Return to the ASIC Hub and paste the Farm Hash into the provided field. This step links your ASIC miner to your HiveOS account, effectively allowing HiveOS to manage and control it
- .
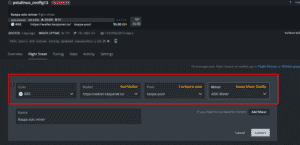
- Setting up Flight Sheet for KASPA:
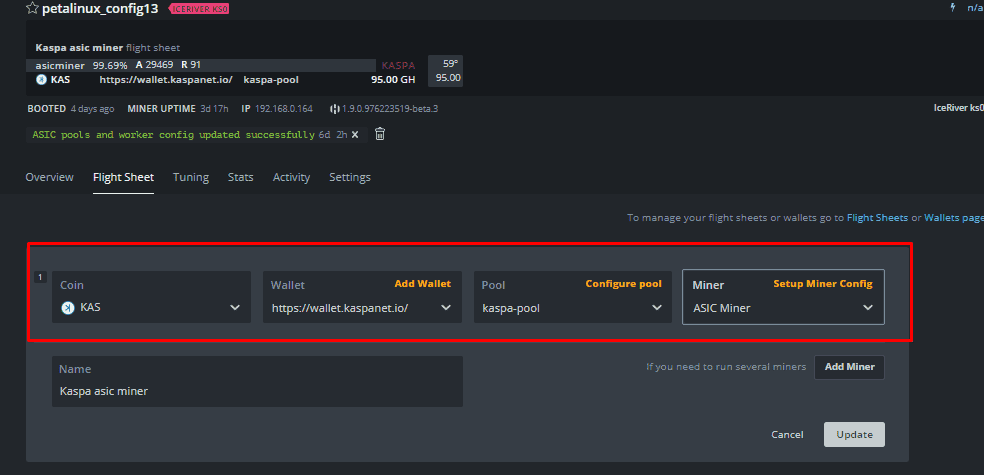
- Flight sheets in HiveOS are configurations that your miner will follow.
- Navigate to the ‘Flight Sheets’ section in HiveOS.
- From the dropdown menus:
- Select KASPA as your coin.
- Add your KASPA wallet address.
- Choose your preferred mining pool.
- Select the type of miner, in this case, choose “ASIC MINER”.
- Once all details are filled out, save or create the flight sheet.
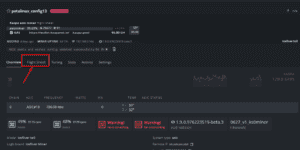
- Applying the Flight Sheet to the ASIC Miner:
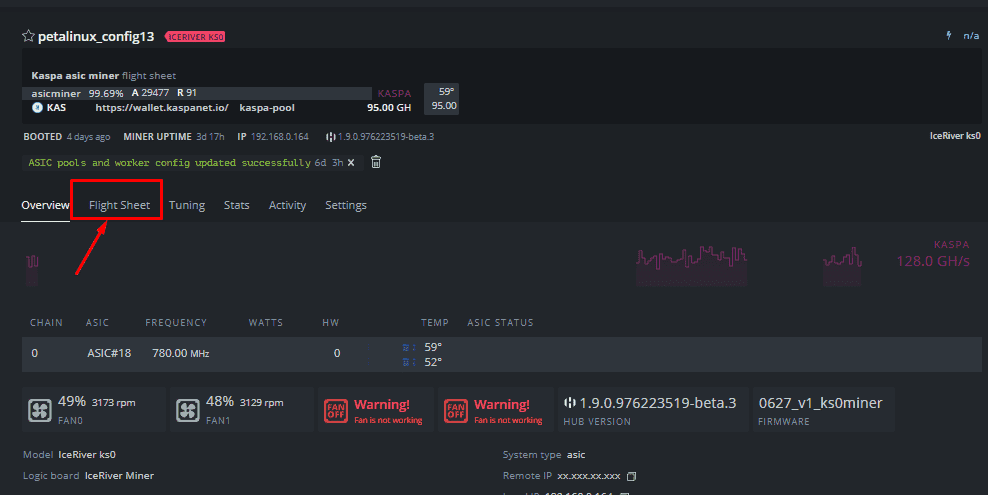
- On your HiveOS dashboard, locate the newly added IceRiver miner.
- Click on the miner to view its details.
- Locate and click on the ‘FlightSheet’ button. From the list of available flight sheets, choose the one you created for KASPA.
- Applying this flight sheet will overwrite the existing configuration on the IceRiver miner, and the miner will start functioning based on the configurations you’ve set in HiveOS.
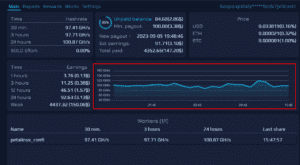
- Monitor Your Miner:
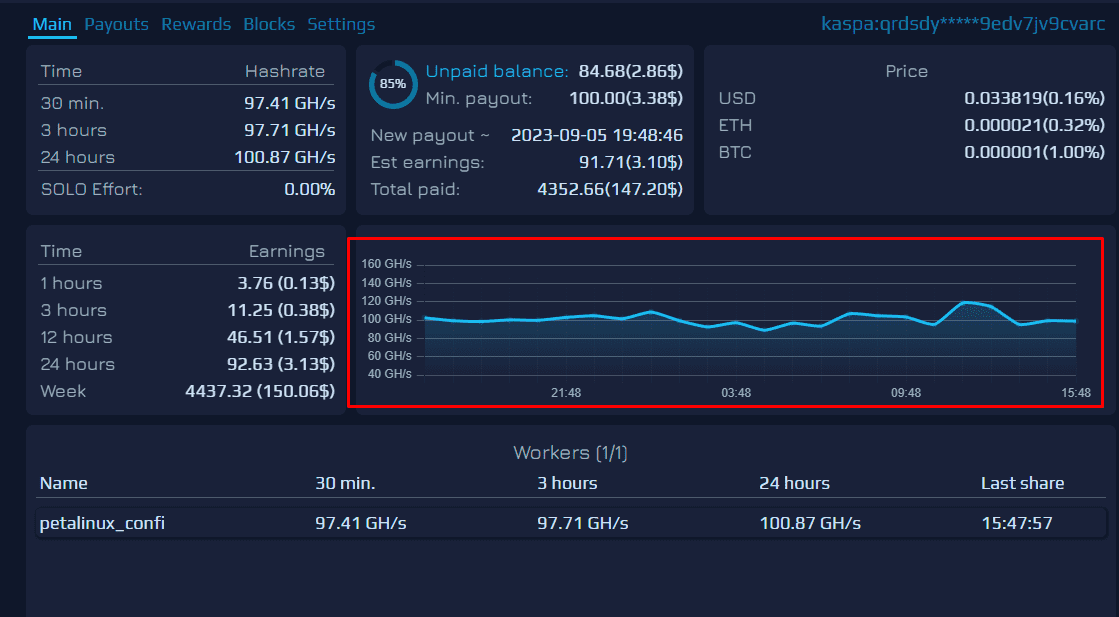
- IceRiver miners typically take a short while, about 5-10 minutes, to reflect the hashrate in the pool after any new configurations are set. During this period, it’s advised to be patient and refrain from making any further changes.
- Once the hashrate starts showing, you can monitor its performance, efficiency, and rewards directly from your HiveOS dashboard.
Final Thoughts:
ASIC Hub is a powerful application that provides miners the capability to manage and monitor their ASIC miners seamlessly. Do remember, however, that while ASIC Hub manages your miners, it doesn’t manage your local network. Hence, when launching the Hub for the first time, specify the range or ranges of IP addresses that you wish to manage.
With the combination of HiveOS and ASIC Hub, your mining operations can be more streamlined, efficient, and manageable from anywhere.
Ice river biggest concurrent Bitmain Antminer KS3 asic miner support currently still not added to hiveos ASIC hub.
Crafting the future, one block at the time!