
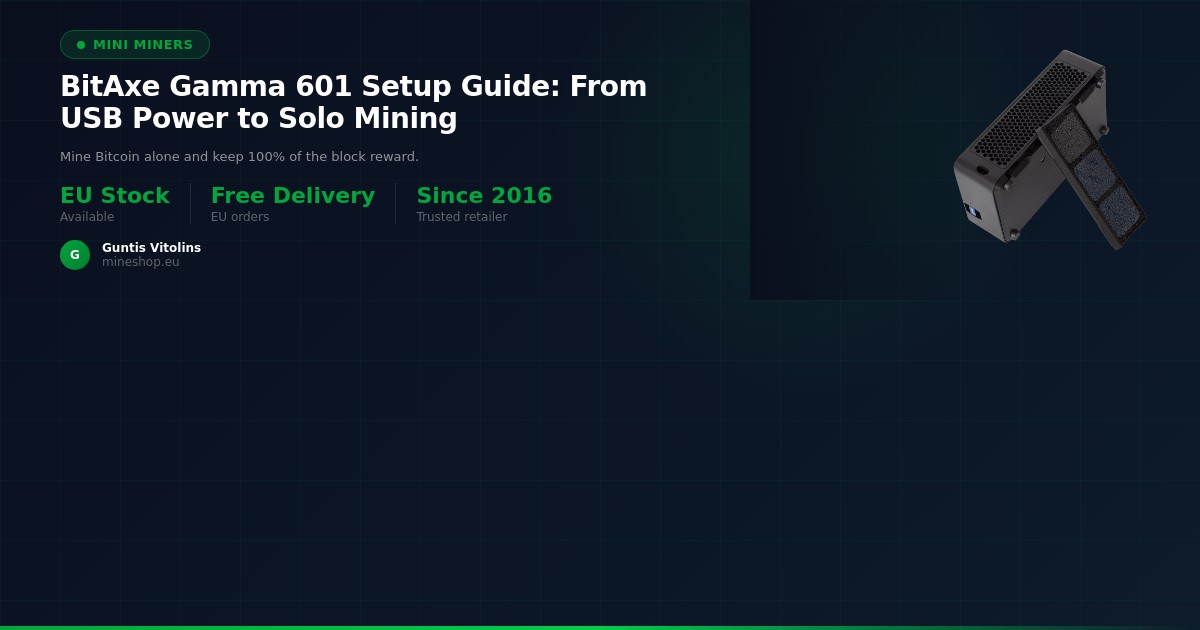
BitAxe Gamma 601 Setup Guide: From USB Power to Solo Mining
Congratulations on receiving your BitAxe Gamma 601 — one of the most accessible open-source Bitcoin miners available today. Whether you purchased it to learn about Bitcoin mining, to contribute hashrate to a solo mining pool, or simply to enjoy the thrill of running your own node-level miner, you've made an excellent choice. This guide walks you through everything from plugging in your USB-C power supply to submitting your first share to a solo mining pool — no prior technical experience required.
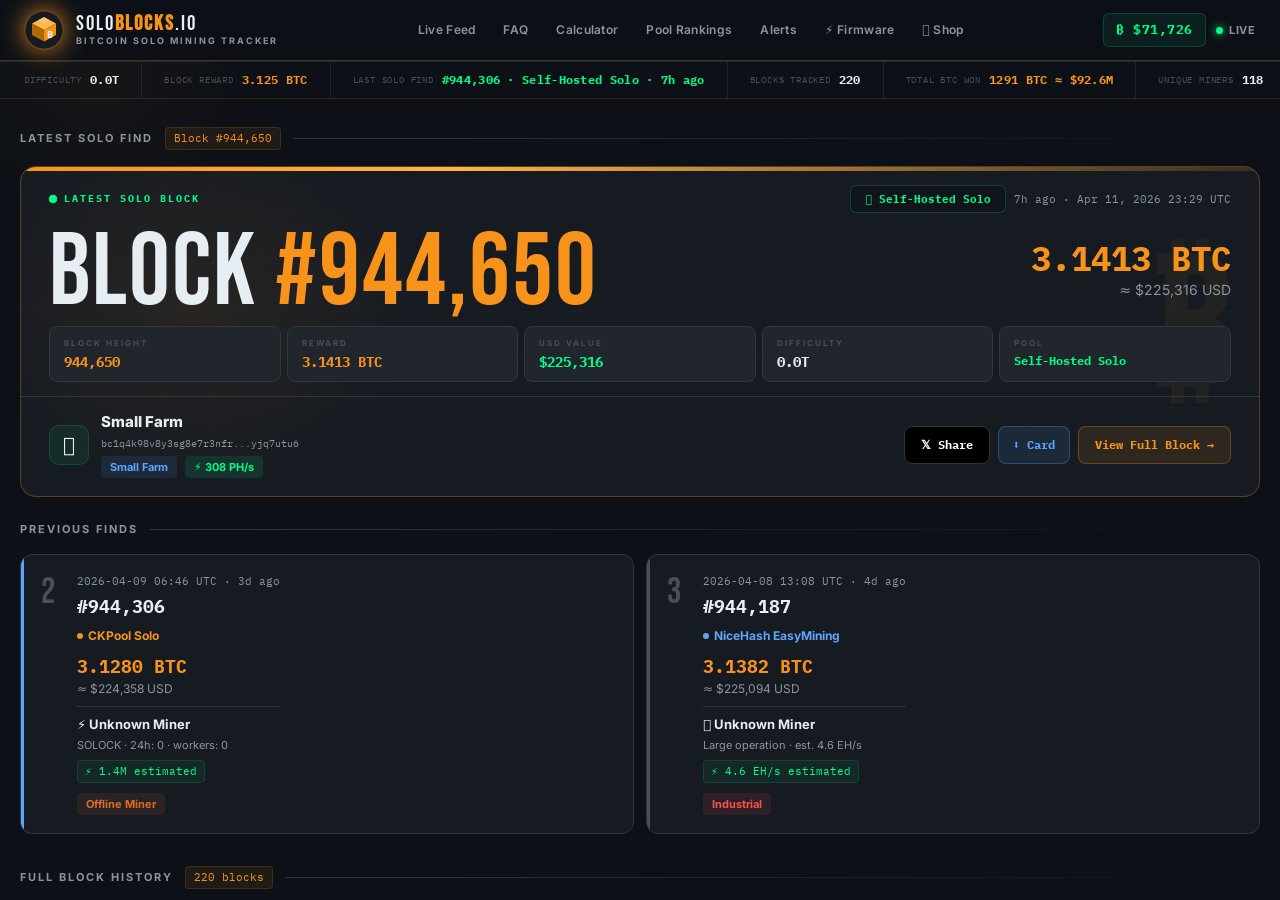
Before you begin, make sure you have everything listed in the next section ready on your desk. The entire setup process takes most people between 15 and 30 minutes. Solo Bitcoin mining is the practice of directing your miner's hashrate toward solving a Bitcoin block entirely on your own, rather than combining hashrate with thousands of other miners in a traditional pool. While the probability of finding a block solo is extremely low for a small device like the BitAxe, many enthusiasts enjoy solo mining through services like CKPool or OCEAN for the lottery-style excitement and the philosophical alignment with Bitcoin's original design. According to soloblocks.io, solo blocks are found by small miners more often than most people expect — making it a genuinely fun experiment.
Mineshop.eu has been supplying European miners with genuine ASIC hardware since 2016, with EU warehouse stock in Ireland and fast DHL/FedEx delivery across all EU countries. Our support team has guided hundreds of customers through setups just like this one, so follow each step carefully and you'll be up and running in no time. If you're curious about larger miners after this experience, browse our full range of ASIC miners or explore our dedicated home miner category for quiet, beginner-friendly options.
What You Need
- BitAxe Gamma 601 unit (the miner itself)
- USB-C power supply — minimum 5V/2A recommended; a quality phone charger or USB-C PD adapter works well
- USB-C cable (preferably the one included in the box or a quality data+power cable)
- A 2.4 GHz Wi-Fi network with your SSID name and password ready
- A desktop or laptop computer, tablet, or smartphone with a modern web browser (Chrome, Firefox, or Safari)
- A Bitcoin wallet address to receive any potential block reward — a standard on-chain address starting with bc1 is ideal
- A solo mining pool account or stratum URL — CKPool and OCEAN both offer solo mining and require no registration (just your wallet address)
- 5–10 minutes of uninterrupted time for the initial Wi-Fi configuration
Step-by-Step Guide
Step 1: Unbox and Inspect the BitAxe Gamma 601
Remove the BitAxe Gamma 601 carefully from its packaging and place it on a flat, non-conductive surface such as a wooden desk. Inspect the board for any visible shipping damage — check that the BM1370 ASIC chip, the small cooling fan, and the AxeOS ESP32 module are all securely mounted. The BitAxe is an open-source hardware device based on the Bitaxe project maintained at proto.xyz, and it ships fully assembled and ready to power on. You should also confirm the USB-C port on the board is clean and undamaged before connecting any cable.
Step 2: Connect the USB-C Power Cable
Plug one end of your USB-C cable into the BitAxe Gamma 601's USB-C port and the other end into your USB-C power adapter. The BitAxe Gamma 601 draws roughly 5–15 watts depending on operating mode, so a 5V/3A or higher USB-C adapter is ideal — most modern phone chargers are sufficient. As soon as power is connected, the small status LED on the board will illuminate and the cooling fan will spin up briefly. You should hear the fan start within two seconds of connecting power; if you don't, disconnect immediately and inspect the fan connector on the board.
Step 3: Connect to the BitAxe Access Point (First Boot)
On first boot, the BitAxe Gamma 601 does not yet know your Wi-Fi credentials, so it broadcasts its own temporary Wi-Fi access point. On your phone, tablet, or laptop, open your Wi-Fi settings and look for a network named something like Bitaxe_XXXXXX (where X characters are unique to your device). Connect to this network — no password is required. Once connected, open your web browser and navigate to http://192.168.4.1 to reach the AxeOS configuration portal.
Step 4: Enter Your Wi-Fi Credentials in AxeOS
AxeOS is the browser-based operating system that controls your BitAxe Gamma 601, allowing you to configure Wi-Fi, pool settings, and performance without installing any software. On the AxeOS setup page, enter your home Wi-Fi network name (SSID) and password in the appropriate fields, then click Save. The BitAxe will reboot automatically and attempt to join your home network — this takes approximately 20–30 seconds. After the reboot, disconnect your device from the Bitaxe access point and reconnect to your normal home Wi-Fi network.
Step 5: Find the BitAxe on Your Home Network
Once the BitAxe Gamma 601 has joined your home Wi-Fi, you need to find its local IP address to access the AxeOS dashboard. The easiest method is to log in to your home router's admin panel (usually at 192.168.1.1 or 192.168.0.1) and look for a connected device named Bitaxe or esp32 in the device list. Alternatively, you can use a free network scanning app such as Fing on your smartphone to find the device quickly. Note down the IP address — it will look something like 192.168.1.105 — and type it into your browser's address bar to open the AxeOS dashboard.
Step 6: Configure Your Mining Pool and Wallet Address
Inside the AxeOS dashboard, navigate to the Settings section. Here you will enter three critical pieces of information: the pool stratum URL, the port number, and your Bitcoin wallet address as the mining username. For solo mining via CKPool, use the stratum address stratum+tcp://solo.ckpool.org:3333 and enter your Bitcoin wallet address (bc1... format) as the username — no password is required (enter anything or leave blank). For OCEAN solo mining, use their published stratum URL with your wallet address similarly configured. Double-check your wallet address character by character — an incorrect address means any reward would be permanently lost.
Step 7: Set Performance Parameters
Still inside AxeOS Settings, you can adjust the operating frequency and core voltage of the BM1370 ASIC chip. The BitAxe Gamma 601 is factory-tuned for a balance between hashrate and temperature, typically targeting around 1.2 TH/s at a chip temperature below 65°C. For beginners, we strongly recommend leaving the default frequency and voltage settings unchanged during your first run. If you wish to experiment later, increase frequency in small steps of 25 MHz and monitor chip temperature carefully — sustained temperatures above 70°C can shorten chip lifespan.
Step 8: Save Settings and Confirm Mining Has Started
Click Save in the AxeOS settings panel, and the device will reboot one final time and begin hashing. Return to the AxeOS dashboard home screen after 30 seconds — you should see live hashrate figures updating every few seconds, a pool connection status showing Connected, and a share submission counter beginning to increment. According to asicminersprofitability.com, the BitAxe Gamma 601's real-world hashrate hovers around 1.1–1.2 TH/s under stable conditions, which is consistent with what you should see on the dashboard. If the pool status shows Disconnected, double-check your stratum URL and ensure your router is not blocking outbound port 3333.
Step 9: Monitor Temperature and Stability
Allow the BitAxe Gamma 601 to run for at least 15 minutes and then return to the AxeOS dashboard to review the chip temperature reading. A healthy operating temperature is between 45°C and 65°C in a well-ventilated room at normal indoor temperatures. If the chip temperature exceeds 68°C, ensure the fan is spinning freely and that there is at least 10 cm of clear airspace around the device. The BitAxe is designed for quiet home operation — placing it on an open shelf rather than inside a drawer or enclosure makes a significant difference to thermals.
Step 10: Bookmark the Dashboard and Set Up Remote Monitoring
Bookmark the BitAxe's local IP address in your browser so you can check on it easily each day. For more advanced monitoring, AxeOS supports basic statistics export, and community-built tools allow you to track your miner's uptime and share submissions over time. You can also check your mining activity directly on your chosen pool's website by searching for your Bitcoin wallet address — CKPool and OCEAN both provide public-facing dashboards where you can see submitted shares and, if you're lucky, any blocks found. Keep the device plugged in continuously for best results — frequent power cycling can disrupt pool connections and cause stale shares.
Quick Reference Table
| Setting / Spec | BitAxe Gamma 601 (Solo) | BitAxe Gamma 601 (Pool) | Notes |
|---|---|---|---|
| Stratum URL (CKPool Solo) | solo.ckpool.org:3333 | N/A for solo | Use wallet address as username |
| Stratum URL (OCEAN Solo) | stratum-v1.ocean.xyz:4444 | N/A for solo | Use wallet address as username |
| Stratum URL (Braiins Pool) | N/A for solo | stratum+tcp://stratum.braiins.com:3333 | Standard pooled mining |
| Typical Hashrate | ~1.1–1.2 TH/s | ~1.1–1.2 TH/s | Same hardware, different pool target |
| Power Consumption | ~10–15W | ~10–15W | Varies by frequency setting |
| Recommended Chip Temp | 45°C – 65°C | 45°C – 65°C | Max safe: ~70°C |
| AxeOS Dashboard Access | http://[device IP] | http://[device IP] | Find IP via router or Fing app |
| Power Supply Required | USB-C 5V/2A minimum | USB-C 5V/2A minimum | 5V/3A recommended for stability |
Common Issues and Fixes
BitAxe Wi-Fi Access Point Not Appearing
If you cannot see the Bitaxe_XXXXXX network after powering on, try disconnecting and reconnecting the USB-C cable to force a reboot. Ensure you are searching for 2.4 GHz networks specifically — the BitAxe Gamma 601 does not support 5 GHz Wi-Fi bands. If the access point still does not appear after two reboots, hold the reset button on the board for 5 seconds to restore factory defaults.
Dashboard Shows "Pool: Disconnected"
This almost always means the stratum URL or port number was entered incorrectly, or your router is blocking outbound connections on that port. Log in to AxeOS Settings, verify the stratum address has no extra spaces, and confirm the port number matches your chosen pool's published settings. If you're using a corporate or ISP-managed router, try switching to port 443 if the pool offers it as an alternative.
Hashrate Showing as 0 or Very Low
A zero hashrate reading immediately after boot is normal for the first 10–15 seconds while the ASIC initialises. If it remains at zero after 60 seconds, navigate to AxeOS Settings and click Restart — this resets the ASIC initialisation sequence. A persistently low hashrate (well below 800 GH/s) may indicate a thermal issue; check that the cooling fan is spinning and that the device has adequate airflow.
Cannot Find the BitAxe IP Address on Home Network
Download the free Fing app on your smartphone and run a network scan — look for a device labelled "Espressif" or "esp32
Solo Mining vs Pool Mining with the BitAxe Gamma 601
The BitAxe Gamma 601 is specifically designed for solo Bitcoin mining — but what does that mean in practice, and should you consider pool mining instead?
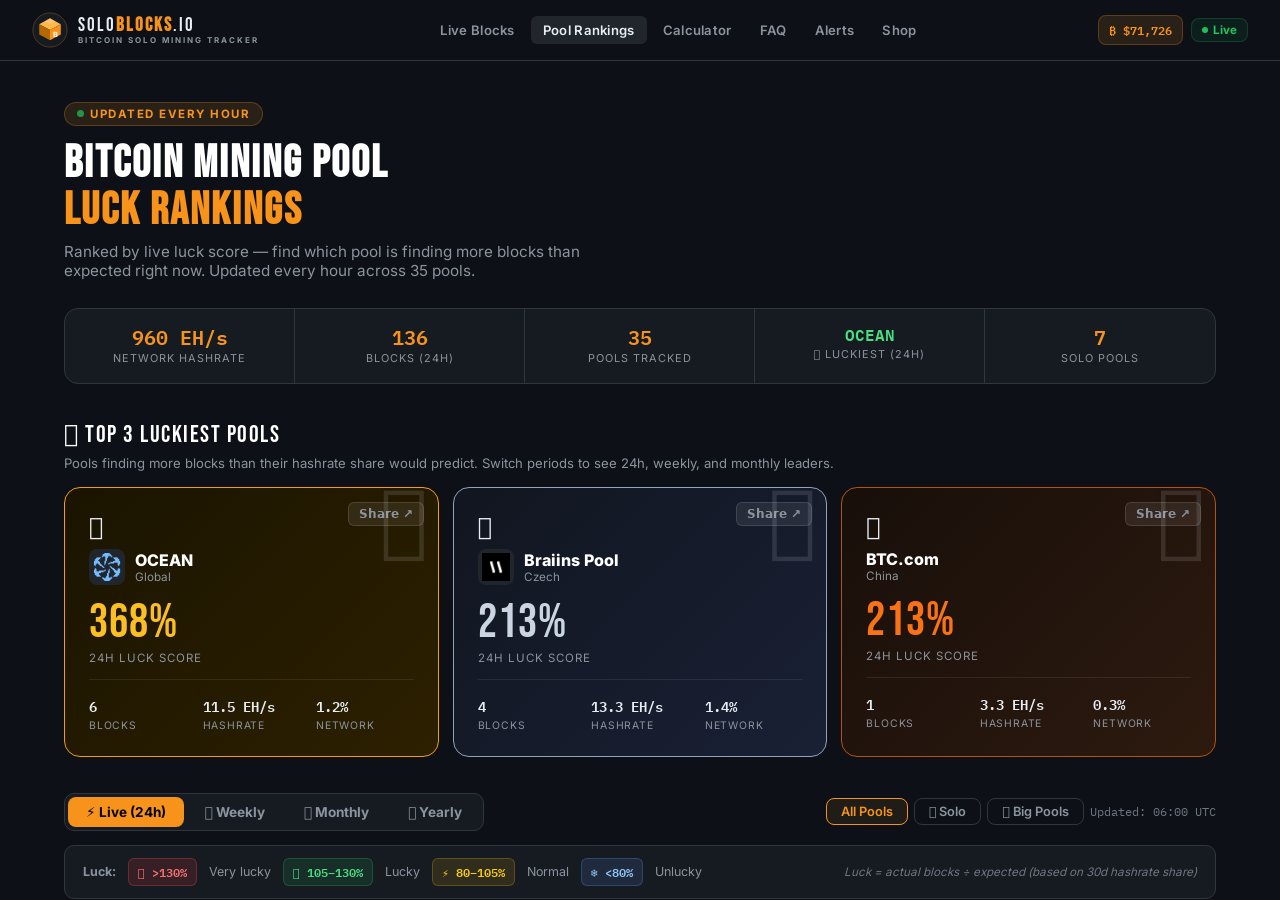
Solo mining connects your BitAxe directly to a solo pool like CKPool Solo or Public Pool. Your device competes independently to find a full Bitcoin block. The odds are extremely low — at 0.5 TH/s against a Bitcoin network difficulty of roughly 100 trillion, you might wait centuries. But if you do find a block, the full 3.125 BTC reward is yours. This is the pure lottery approach, and many enthusiasts run a BitAxe purely for the experience and the tiny chance of a life-changing find.
Pool mining combines your hashrate with thousands of other miners. You receive tiny, regular payouts proportional to your contribution — but at 0.5 TH/s, your share is so small that payouts will be measured in satoshis per day. For most home users, pool mining with a BitAxe is primarily educational rather than profitable.
The honest answer: the BitAxe Gamma 601 is not a profit machine. It is a learning tool, a hobby device, and — for the lucky few — a lottery ticket. If profitability is your goal, consider a purpose-built mini Bitcoin miner with higher hashrate, or explore our full range of ASIC miners for serious home mining. For solo mining enthusiasts who want more hashrate without giving up the spirit of home mining, the NerdQaxe++ delivers 3 TH/s in the same open-source format.
BitAxe Gamma 601 Specifications
Full hardware specifications for the BitAxe Gamma 601 open-source Bitcoin miner:
| Specification | Details |
|---|---|
| Hashrate | ~0.5 TH/s |
| Algorithm | SHA-256 (Bitcoin) |
| Power Consumption | ~15–20W |
| Power Input | USB-C (5V/3A minimum) |
| Connectivity | Wi-Fi (2.4GHz) |
| ASIC Chip | BM1370 (Bitmain) |
| Open Source | Yes — hardware and firmware |
| Form Factor | Compact desktop unit |
| Cooling | Built-in fan |
| Best For | Learning, hobby mining, solo lottery |
Frequently Asked Questions
How long does it take to set up the BitAxe Gamma 601?
A: Most users complete the initial setup — from unboxing to submitting the first share — in under 15 minutes. The process involves connecting the USB-C power supply, joining the BitAxe to your Wi-Fi network via the AxeOS web interface (accessible at the device's IP address), entering your Bitcoin wallet address and preferred pool details, and saving. No tools, no technical background required.
What pool should I use with the BitAxe Gamma 601?
A: For solo Bitcoin mining, the most popular options are CKPool Solo (ckpool.org) and Public Pool (public-pool.io). Both are free, require no registration, and pay directly to your Bitcoin wallet address if you find a block. CKPool is the largest and most established; Public Pool is fully open-source. For educational pool mining, NiceHash or any standard Stratum-compatible pool will work.
Can the BitAxe Gamma 601 mine profitably?
A: At 0.5 TH/s against the current Bitcoin network difficulty, profitable mining is not realistic. At EU electricity prices of €0.20–0.30/kWh, the BitAxe Gamma 601 costs roughly €1–1.50 per month to run and will mine a tiny fraction of a satoshi per day in pool mining. It is best understood as a hobby device, educational tool, or solo mining lottery ticket — not a revenue generator. For home miners seeking actual returns, look at our range of more powerful mini miners.
What is the difference between the BitAxe Gamma 601 and the NerdQaxe++?
A: Both are open-source home Bitcoin miners. The BitAxe Gamma 601 delivers approximately 0.5 TH/s at 15–20W, while the NerdQaxe++ achieves around 3 TH/s with greater power draw. The NerdQaxe++ is for miners who want significantly more hashrate while keeping the open-source, home-friendly form factor. The BitAxe Gamma 601 is the entry-level option — simpler setup, lower power, lower cost.
Does the BitAxe Gamma 601 need a full Bitcoin node?
A: No. The BitAxe connects to a solo pool, which handles communication with the Bitcoin network on your behalf. You do not need to download the blockchain or run Bitcoin Core. Simply connect to a solo pool with your Bitcoin wallet address and the pool manages everything else.
What happens if the BitAxe Gamma 601 finds a block?
A: If your BitAxe finds a valid Bitcoin block, the full block reward (currently 3.125 BTC) is sent directly to your Bitcoin wallet address. The solo pool takes no cut — or a minimal 2% fee in CKPool's case. The odds are extraordinarily low, but it does happen: self-hosted solo miners and home BitAxe devices have occasionally found blocks.
Related Blog
Solo Bitcoin-mining hemma 2026
Jul 13, 2026 by Guntis Vitolins
Mineshop mini bitcoin miner
Minería en Solitario de Bitcoin desde Casa en 2026
Jul 13, 2026 by Guntis Vitolins
Mineshop mini bitcoin miner
Le minage solo de Bitcoin à la maison en 2026
Jul 13, 2026 by Guntis Vitolins
Mineshop mini bitcoin miner
Solo Bitcoin Mining Vanuit Huis in 2026
Jul 13, 2026 by Guntis Vitolins
Mineshop mini bitcoin miner