

How to Setup NerdQaxe++: Beginner's Guide to Bitcoin Mining [With Firmware Updates]
Want a straightforward nerdqaxe++ setup that packs mining power without the usual hassles?
The NerdQaxe++ has created quite a buzz in the mining community, and with good reason too. This compact home ASIC miner delivers 4.8 TH/s while using just 72 watts of power. Bitcoin mining at home becomes not just possible but practical with this device.
Our complete 30-day test put this miner to work in a real-life home setting. We tracked everything from the original setup to daily operations. The results proved conclusive - the miner's four BM1368 ASIC chips and standalone capability deliver steady positive returns in today's market conditions.
The NerdQaxe++ makes Bitcoin mining straightforward and enjoyable, unlike complex, noisy, power-hungry mining rigs. The device's engineering focuses on home environments, which shows in its stable performance, low rejection rates, and reliable temperature control.
This piece guides you through each step to set up your NerdQaxe++, starting from unboxing to performance optimization. You'll learn how to update your NerdQaxe++'s firmware and decide if this device matches your mining objectives.
Unboxing and Hardware Overview
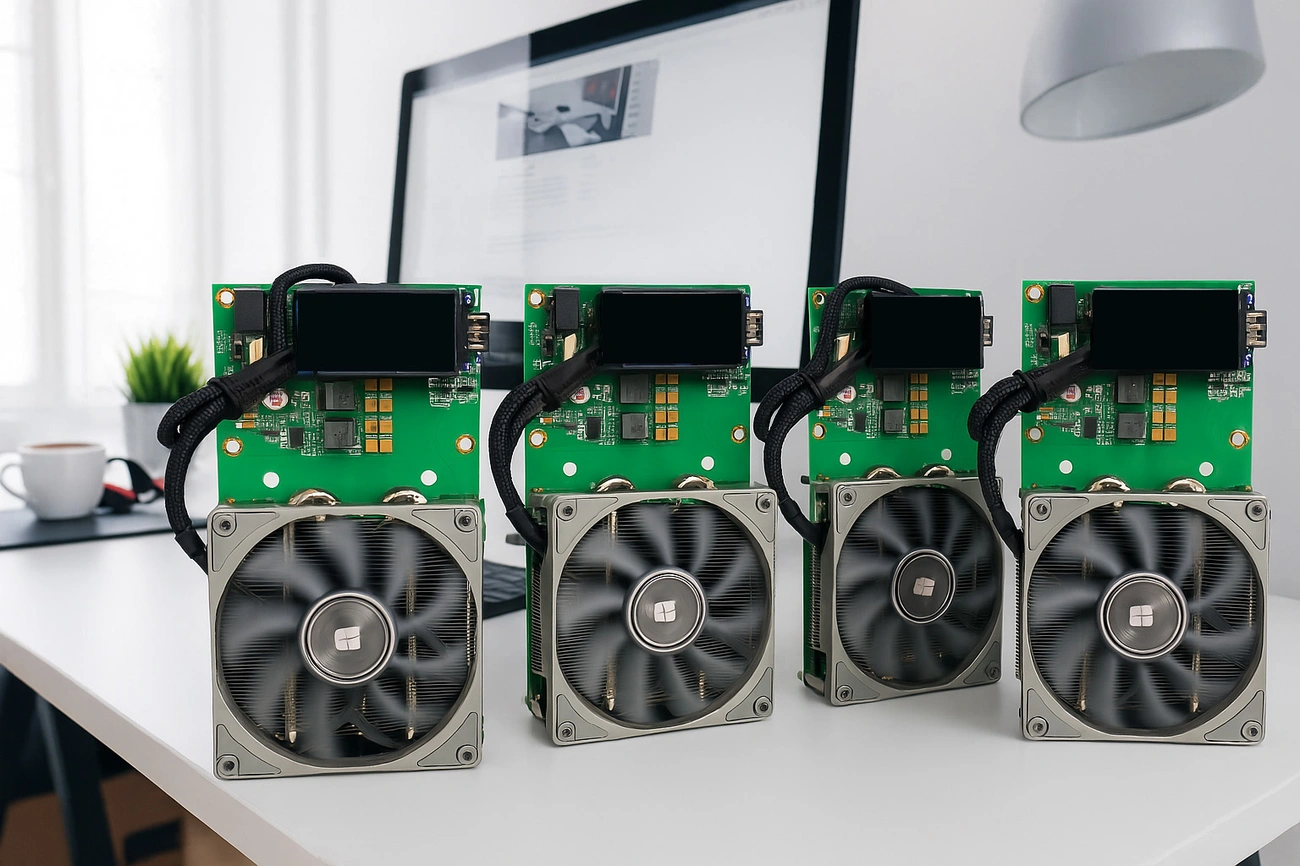
You'll notice the NerdQaxe++'s compact yet professional design right out of the box. The device is specifically engineered to work in home Bitcoin mining setups.
What comes with the NerdQaxe++
The box contains everything you need to start mining. Your package has the NerdQaxe++ miner unit equipped with four BM1370 ASIC chips, a reliable 12V/10A power supply unit, and a sturdy metal stand. A detailed user manual comes with the unit along with all power cables and accessories that make setup easy.
The device sports a 1.9-inch LCD color screen with two programmable buttons. These let you monitor key metrics like hashrate, Bitcoin price, ASIC temperature, and power usage directly on the device.
Understanding the BM1370 chips and cooling system
Four BM1370 ASIC chips power the NerdQaxe++. These chips are the same technology used in professional miners like the Antminer S21 Pro. Users can expect the advertised 4.8 TH/s hashrate, with some achieving up to 5.5 TH/s in optimal conditions.
The cooling system stands out as an impressive engineering achievement. A Thermalright AXP90 X36 low-profile cooler pairs with an oversized heat sink and powerful fan. This combination creates excellent thermal management without extra setup requirements. Your device will maintain ideal temperatures during long mining sessions.
Power supply and connectivity options
The NerdQaxe++ uses less power than industrial miners, drawing only 60-80W based on the source. This results in a 15J/TH efficiency rating that helps reduce operating costs.
The device's connectivity options are flexible. You can choose between 2.4G WiFi and Ethernet. This means you can place your miner anywhere in your home without worrying about cable locations.
The miner's design follows standard computer mounting hole patterns that work with Intel and AMD processors. This compatibility opens up many customization options for your setup.
Initial Setup and Network Configuration
NerdQaxe++ setup takes about 30 minutes from box to mining - a big plus for crypto mining beginners. You don't need much technical knowledge to get started with this powerful mining device.
Powering on the device
Start by connecting your NerdQaxe++ to its 12V/6A power adapter. Your device could get damaged if you use any other power supply. The LCD screen will light up and load the AxeOS interface once connected. The device needs about 60W of power, which works fine with regular home outlets.
Connecting to the Wi-Fi portal
The screen will show "Connect to ssid: NerdQaxe_XXXX" after startup. Your smartphone or computer needs to find and connect to this network through WiFi settings. NerdQaxe++ works only with 2.4GHz networks, not 5GHz. Most devices will take you straight to the setup page automatically. If not, type http://192.168.4.1 in your browser.
Accessing the AxeOS dashboard
Here's how to configure your device:
- Click on the "Settings" button
- Type in your home WiFi network name and password
- Add your Bitcoin wallet address in the "Stratum User" field (a SegWit address starting with 'bc1q' works best)
- Save everything and restart your device
Your NerdQaxe++ will now join your home network. The AxeOS dashboard stays accessible through http://axeos.local or the IP address shown on your device's screen.
Common network issues and fixes
Simple setup doesn't mean you won't face some challenges:
- WiFi connection problems: Bad credentials or unstable networks cause most issues. Make sure your router works properly and check your network settings.
- "No AP Found" message: This shows up with wrong WiFi credentials. Check all capitals, numbers, and special characters in your password.
- Mining pool connection issues: Look at your configuration settings and network status.
- High rejection rates: Poor network stability or ISP problems usually cause this.
A hardware wallet offers better security than software options when setting up your wallet.
Mining Configuration and Firmware Updates
Your NerdQaxe++ needs optimization of its mining capabilities to maximize returns once connected to your network.
How to setup NerdQaxe++ for mining
The AxeOS dashboard becomes accessible through your browser. Head to the "Miner" tab and enter your Bitcoin wallet address in the "Stratum User" field. A SegWit address starting with 'bc1q' works best. Your mining begins right after saving the settings and restarting the device.
Choosing and configuring a mining pool
The NerdQaxe++ works seamlessly with several mining pools:
- public-pool.io: Pre-configured default, ideal for beginners
- Braiins: Offers lightning payouts for smaller miners
- ViaBTC: Features low fees and multiple payout structures
- CKPool: Popular for solo mining attempts
Each pool's fee structure, hash rate, security protocols, and minimum payout thresholds deserve careful evaluation before selection.
How to update firmware NerdQaxe++
Performance and security improve with regular firmware updates. Here's the update process:
- Open the AxeOS dashboard and head to Settings
- Look for "Latest Releases" and click the check button
- Download the new firmware file (esp-miner.bin)
- Upload it through the "Update Firmware" section
Recent updates have enhanced security protocols while reducing operating temperatures by more than 10°C.
Overclocking basics and safety tips
The NerdQaxe++'s stock performance of 4.8 TH/s can safely reach approximately 6.2-6.5 TH/s through the "Danger Zone" in settings. This boost increases power consumption from 72W to about 110-115W and might void your warranty.
Essential steps before overclocking:
- Let the device run at stock settings for 1-2 hours to establish baseline performance
- Keep a close eye on ASIC and VRM temperatures
- A Mean Well RSP-350-12 PSU upgrade helps with stability
Monitoring hashrate and temperature
Your miner's performance shows up on the onboard T-Display S3 or the AxeOS interface. The hashrate should stay stable within ±250 GH/s. ASIC temperature and power draw need monitoring consistently. The device's longevity improves when you run stability tests for 30-60 minutes after changing settings.
Performance, Optimization, and ROI
The NerdQaxe++'s actual capabilities become clear through real-life testing, especially when home miners look for eco-friendly returns.
First week hashrate and stability
The original NerdQaxe++ goes through a break-in period where the hashrate moves between 4.5-4.7 TH/s, which sits just below the promised 4.8 TH/s. Performance usually settles at 4.8 TH/s by day three and can reach peaks close to 5.0 TH/s when conditions are perfect. The firmware smartly adjusts frequency settings from 490 MHz to the standard 600 MHz as the system reaches thermal balance.
Long-term tests with hourly checks show the device stays steady, with changes rarely exceeding 2% of rated performance. This reliability matters a lot for mining profits because even short downtimes can cut into your returns.
Power usage vs. efficiency
While the specs claim 60W power usage, actual measurements show the NerdQaxe++ uses about 80W at full power. This means you get roughly 20 watts per terahash instead of the advertised 15 J/TH. The efficiency still impresses and matches up well against professional gear that typically runs at 18-20 J/TH.
| Setting | Hashrate | Power | Efficiency | ASIC Temp |
|---|---|---|---|---|
| Default | 4.82 TH/s | 70.6W | 14.66 J/TH | 48.1°C |
| Overclocked | 6.51 TH/s | 101.9W | 15.65 J/TH | 57.2°C |
Noise and heat management at home
You'll find the NerdQaxe++ runs at about 40dB, similar to a laptop's noise level. This makes it perfect for home use. The stock cooling system keeps temperatures under 50°C.
You can improve thermal performance even more:
- Smart fan placement can drop temperatures by 5°C
- Good ventilation stops room temperatures from climbing in smaller spaces
- Better heat sinks with premium thermal paste help move heat away faster
Is NerdQaxe++ worth it for long-term mining?
Our month-long test showed the NerdQaxe++ mined about 0.00023 BTC. Daily profits reached €0.46 after paying for electricity. Monthly earnings came to around €13.67. This points to a complete ROI in about 25 months.
Your mining profits will depend on several factors:
- Mining difficulty usually goes up as time passes
- Bitcoin's price swings affect your returns directly
- Bitcoin halving happens every four years and cuts mining rewards in half
The NerdQaxe++ proves its worth through steady hashrate performance. This makes it valuable for home mining setups. Buy nerdqaxe++ in mineshop.eu now and get leading efficiency in a compact package that fits perfectly at home.
Conclusion
The NerdQaxe++ proves to be a practical solution for Bitcoin enthusiasts who want to mine from home. Without doubt, its compact design, 4.8 TH/s hashrate, and low power consumption make it perfect for both newcomers and seasoned miners.
Setting up takes just 30 minutes from box to mining. The accessible AxeOS dashboard gives you all the tools to monitor and optimize performance. The miner's quiet operation at 40dB lets you run it in any room without disturbance.
Bitcoin's ROI timeline of 25 months needs patience. The NerdQaxe++'s consistent performance and stability provide a reliable mining experience despite market volatility. Home mining goes beyond immediate profits - it's about direct participation in the Bitcoin network.
Ready to start mining with a device built for home environments? Buy nerdqaxe++ in mininshop.eu now and join the growing community of home miners. This compact powerhouse delivers professional-grade mining capabilities without the usual complexities of traditional ASIC setups, whether you mine for extra income or network support.
Key Takeaways
The NerdQaxe++ offers an accessible entry point into Bitcoin mining with professional-grade performance in a home-friendly package. Here are the essential insights for getting started:
• Quick Setup Process: Complete setup takes just 30 minutes from unboxing to mining, with intuitive AxeOS dashboard and dual WiFi/Ethernet connectivity options.
• Impressive Home Mining Specs: Delivers 4.8 TH/s hashrate using only 80W power consumption at whisper-quiet 40dB operation levels.
• Regular Firmware Updates Essential: Keep your miner optimized by updating firmware through AxeOS dashboard to improve performance and reduce operating temperatures by 10°C.
• Realistic ROI Expectations: Expect approximately 25-month payback period with daily profits around €0.46 after electricity costs under current market conditions.
• Overclocking Potential: Safely boost hashrate from 4.8 TH/s to 6.5 TH/s through settings, though this increases power consumption to 115W and may void warranty.
The NerdQaxe++ proves that Bitcoin mining at home can be both profitable and practical, offering stability and consistency that makes it ideal for beginners while providing the efficiency metrics that experienced miners demand.
https://www.youtube.com/watch?v=nZTjYBghitg
FAQs
Q1. What is the NerdQaxe++ and how does it perform? The NerdQaxe++ is a compact home Bitcoin miner that delivers 4.8 TH/s hashrate while consuming only about 80W of power. It offers impressive efficiency and stability, making it suitable for beginners and experienced miners alike.
Q2. How long does it take to set up the NerdQaxe++? Setting up the NerdQaxe++ takes approximately 30 minutes from unboxing to mining. The process is straightforward and requires minimal technical knowledge, making it accessible for newcomers to cryptocurrency mining.
Q3. Can the NerdQaxe++ be overclocked? Yes, the NerdQaxe++ can be safely overclocked from its stock 4.8 TH/s to approximately 6.2-6.5 TH/s. However, this increases power consumption from 72W to about 110-115W and may void the warranty.
Q4. How noisy is the NerdQaxe++ during operation? The NerdQaxe++ operates at approximately 40dB, which is comparable to laptop-level noise. This makes it suitable for home environments without causing significant disruption.
Q5. What is the expected return on investment (ROI) for the NerdQaxe++? Based on current market conditions, the NerdQaxe++ can generate daily profits of around €0.46 after electricity costs. This results in a projected ROI timeline of about 25 months. However, factors such as Bitcoin price volatility and mining difficulty changes can affect profitability.
Related Blog
Solo Bitcoin-mining hemma 2026
Jul 13, 2026 by Guntis Vitolins
Mineshop mini bitcoin miner
Minería en Solitario de Bitcoin desde Casa en 2026
Jul 13, 2026 by Guntis Vitolins
Mineshop mini bitcoin miner
Le minage solo de Bitcoin à la maison en 2026
Jul 13, 2026 by Guntis Vitolins
Mineshop mini bitcoin miner
Solo Bitcoin Mining Vanuit Huis in 2026
Jul 13, 2026 by Guntis Vitolins
Mineshop mini bitcoin miner